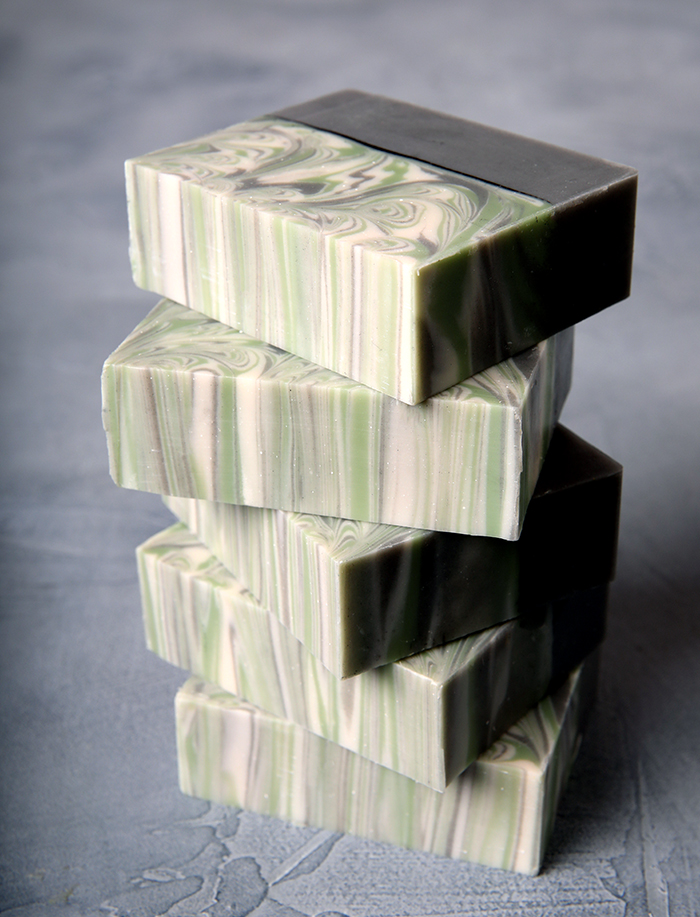
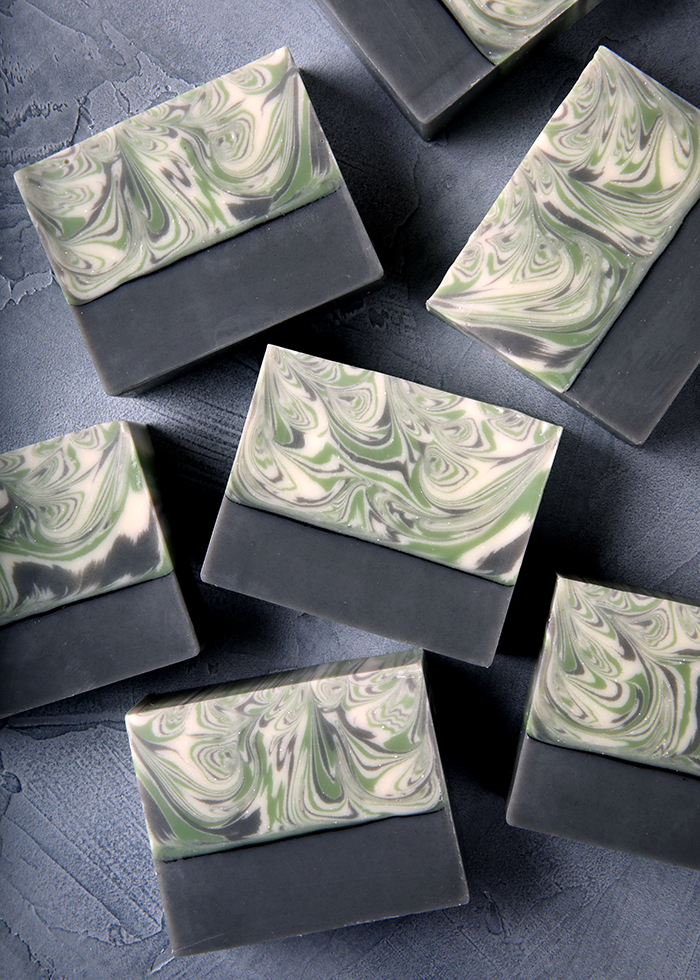
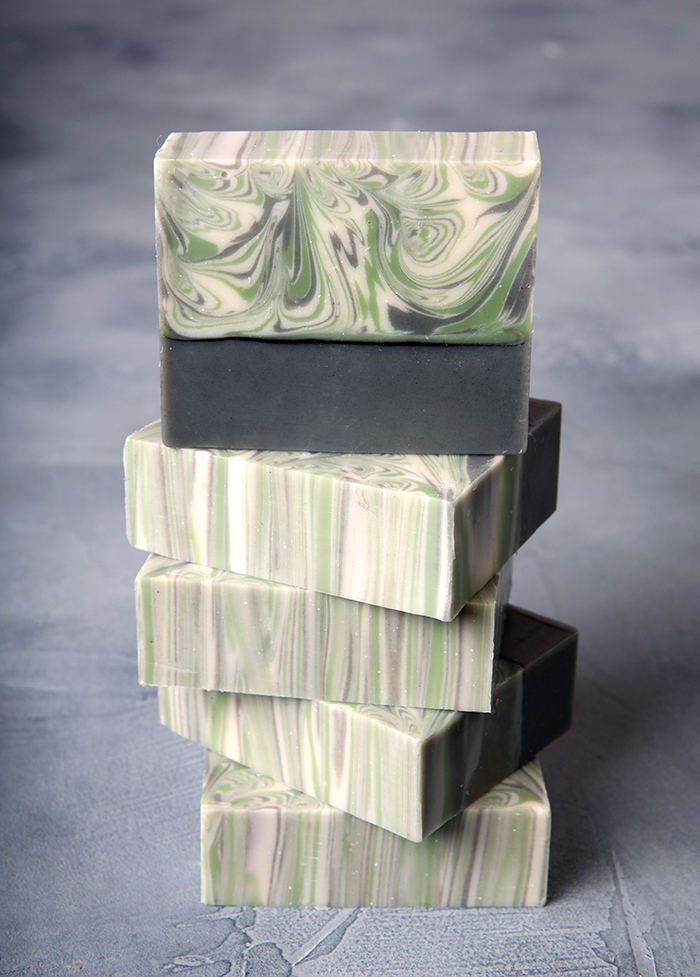
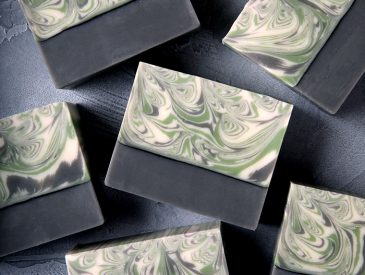
Birch trees are known for their beautiful white trunks. The colors and textures of those trees, along with new Birchwood Oud Fragrance Oil, inspired this cold process soap. These bars feature two layers separated by a line of activated charcoal. The bottom half is colored with activated charcoal and the top layer is made using the Clyde Slide technique. If you’re an advanced soaper ready for a challenge, this project is for you.
This recipe contains several luxurious oils including jojoba oil, chia seed oil, and lingonberry seed oil. Coconut oil and palm oil add cleansing properties and firmness to the bars. Olive oil is moisturizing and slows down trace, which allows for the complicated swirl on top.
The Clyde Slide technique was made popular by Clyde Yoshida of Vibrant Soap. It involves layering soap into a large bowl and then pouring it in the mold. It can result in very different swirls depending on the number of layers, the thickness of trace, and how the soap is poured into the mold. We recommend always using a well-behaving fragrance oil for this technique, and be ready to work quickly but carefully.
Check out the winners from Amy Warden’s Clyde Slide challenge several years ago to see the wide range of swirls that can be created with the technique. We love how each bar looks so different!
Birchwood Oud Cold Process Soap
What You Need:
5 Pound Mold with Sliding Bottom
Silicone Liner for 5 lb. Wood Mold
13.8 oz. Coconut Oil (25%)
2.8 oz. Jojoba Oil (5.1%)
5.5 oz. Lingonberry Seed Oil (10%)
2.8 oz. Chia Seed Oil (5%)
16.5 oz. Olive Oil (29.9%)
13.7 oz. Palm Oil (24.9%)
7.6 oz. Sodium Hydroxide Lye
16.4 oz. Distilled Water (10% water discount)
3.5 oz. Birchwood Oud Fragrance Oil
Titanium Dioxide
Activated Charcoal
Green Chrome Oxide Pigment
Evergreen Mica
Click below to add everything you need for this project to your Bramble Berry shopping cart!
Find the supplies you need for this project below
Birchwood Oud Fragrance Oil5 Pound Mold with Sliding BottomSilicone Liner for 5 lb Wood MoldLingonberry Seed OilMeadowfoam OilJojoba OilPalm OilOlive OilCoconut OilActivated CharcoalTitanium DioxideGreen Chrome Oxide PigmentEvergreen MicaSodium Hydoxide Lye
If you’ve never made cold process soap before, stop here. We highly recommend checking out our FREE four part SoapQueen.tv series on cold process soapmaking, especially the episode on lye safety. And if you’d rather do some reading, Bramble Berry carries a wide range of books on the topic, including Pure Soapmaking.
COLORANT PREP: Disperse 1 teaspoon of titanium dioxide into 1 tablespoon of a lightweight liquid oil such as sunflower or sweet almond. In separate containers, disperse 1/2 teaspoon Green Chrome Oxide Pigment and 1/2 teaspoon Evergreen Mica into 1/2 tablespoon of lightweight liquid oil. Finally, disperse 1 teaspoon of activated charcoal into 1 tablespoon of lightweight oil. Use a mini mixer to get rid of clumps.
Optional: To ensure the titanium dioxide blends smoothly into the soap, we recommend micronizing it before dispersing it in oil. Use a coffee grinder to break up any clumps of color and prevent streaks of white from showing in the final soap. We like to use a coffee grinder that has a removable stainless steel mixing area for easy cleaning.
FRAGRANCE PREP: In a glass fragrance oil-safe container, measure out 3.5 ounces of Birchwood Oud Fragrance Oil and set aside.
SAFETY FIRST: Suit up for safe handling practices. That means goggles, gloves, and long sleeves. Make sure kids, pets, other distractions, and tripping hazards are out of the house or don’t have access to your soaping space. Always soap in a well-ventilated area.
ONE: Slowly and carefully add 7.6 ounces of lye to 16.4 ounces of distilled water. Gently stir until the lye has fully dissolved. Set it aside to cool. If you’d like a harder bar of soap that releases faster from the mold, you can add sodium lactate to the cooled lye water. Use 1 teaspoon of sodium lactate per pound of oils in the recipe. For this recipe, you’d add 3.5 teaspoons sodium lactate.
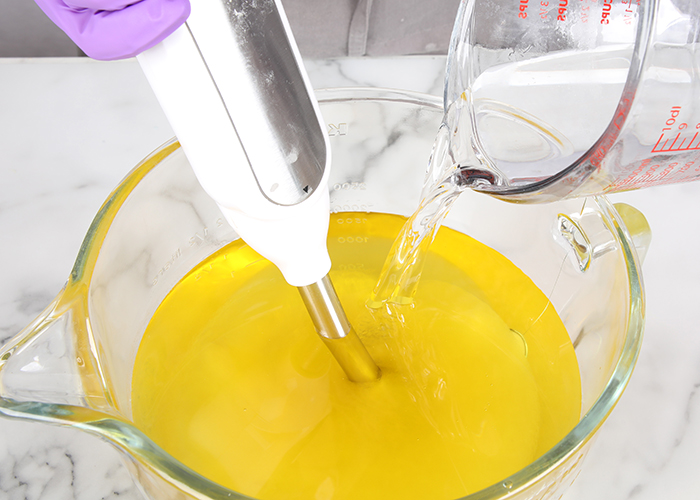
TWO: Melt and combine 13.8 ounces of coconut oil, 2.8 ounces of jojoba oil, 5.5 ounces of lingonberry seed oil, 2.8 ounces of chia seed oil, 16.5 ounces of olive oil, and 13.7 ounces of palm oil (completely melt the entire container of palm oil before portioning) into a large mixing bowl. Once the lye water and the oils have cooled to 130 degrees F or below (and are ideally within 10 degrees of each other), add the lye water to the oils and stick blend the mixture to a very thin trace.
THREE: Pour off 800 mL of soap into a separate container and add 1.5 teaspoons of dispersed activated charcoal.
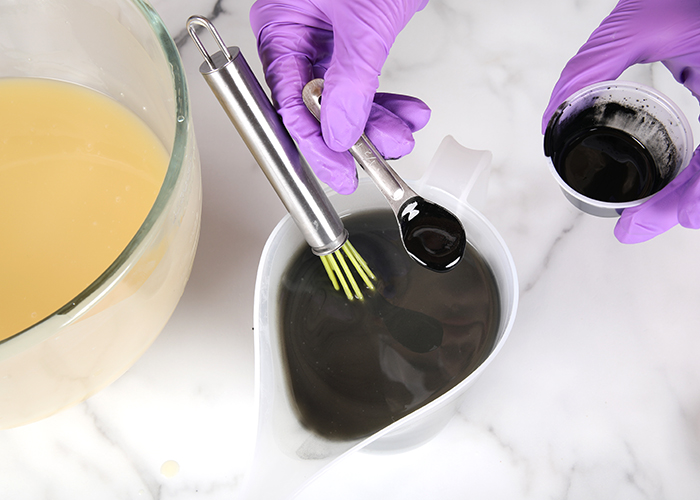
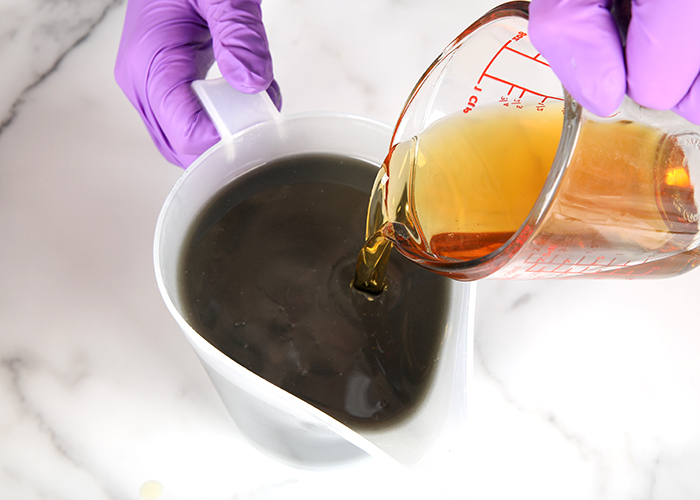
FOUR: Add a proportional amount of the measured Birchwood Oud Fragrance Oil to the gray soap – it’s okay to eyeball it.
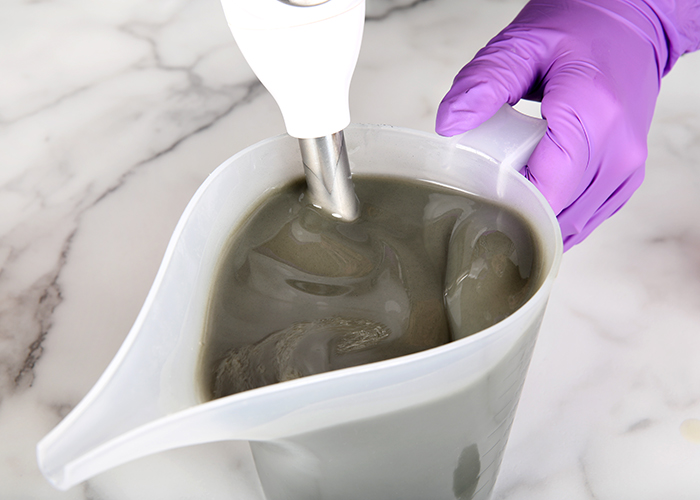
FIVE: Stick blend the soap for a few pulses to fully mix in the fragrance and colorant, and to reach a slightly thicker trace. The soap needs to be thin enough to pour and spread out in the mold evenly. You want the soap to be smooth and not hold any texture. That will give you the straightest layer.
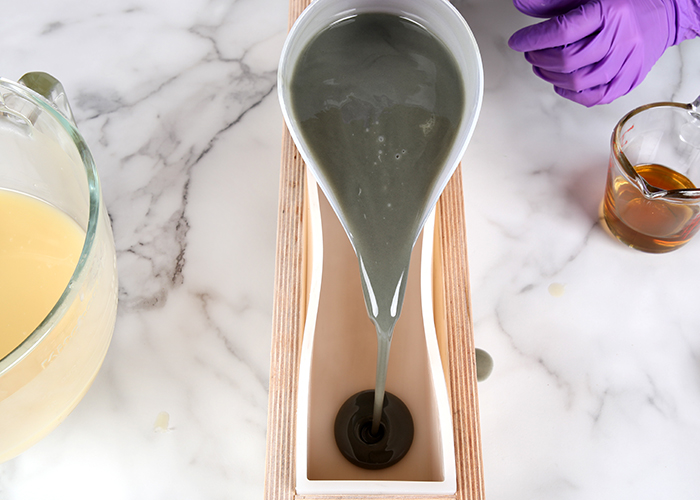
SIX: Pour all of the gray soap into the mold. Tap the mold on the counter to help get rid of bubbles and to evenly distribute the soap.
NOTE: If this layer of soap gets too thick, you may want to texture the soap with a spoon to create a purposefully uneven layer. It will still look great, just a little bit different. You can see that technique in the Lingonberry Spice Cold Process Soap or the Coastal Rain Cold Process Soap.
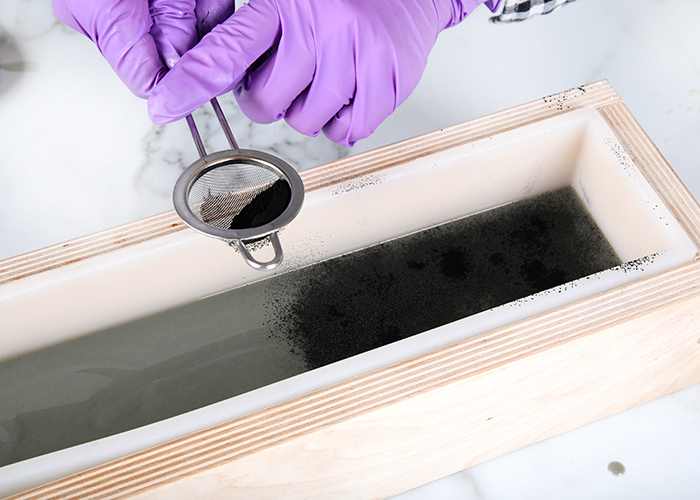
SEVEN: Place a spoonful of activated charcoal into a Powder Duster. Use your finger to gently tap the Powder Duster and apply a thin, even layer of charcoal. Work quickly but carefully – activated charcoal can be a pain to clean up. Once the entire layer of soap is covered with a layer of charcoal, set the mold aside.
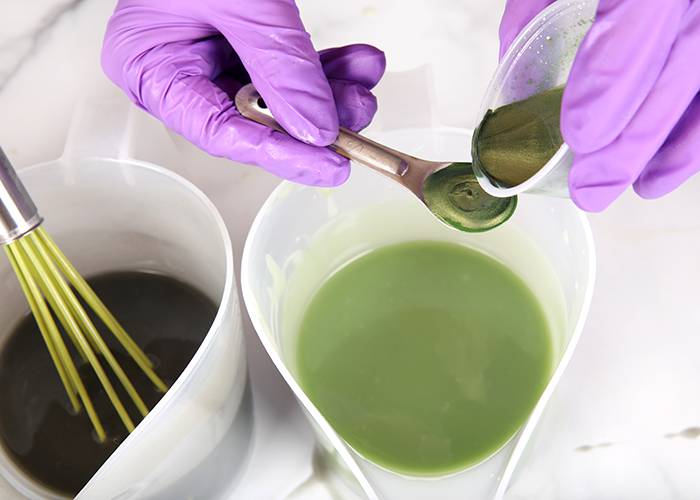
EIGHT: Section off the remaining soap into separate containers. Add the following amounts of dispersed colorants to each container, and mix them in with a whisk.
- Container A (700 mL): All dispersed titanium dioxide
- Container B (400 mL): Remaining dispersed activated charcoal
- Container C (400 mL): 1/4 teaspoon dispersed Green Chrome Oxide + 1/2 teaspoon dispersed Evergreen Mica

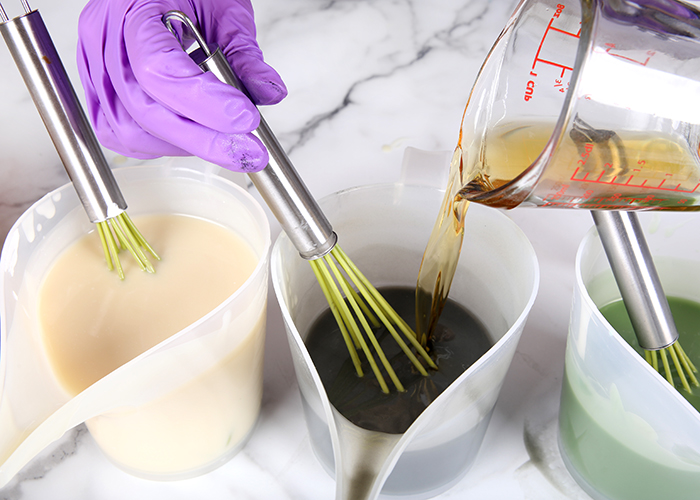
NINE: Pour the remaining Birchwood Oud Fragrance Oil into the three containers proportionally – it’s okay to eyeball it. Use a whisk to fully mix in the fragrance.
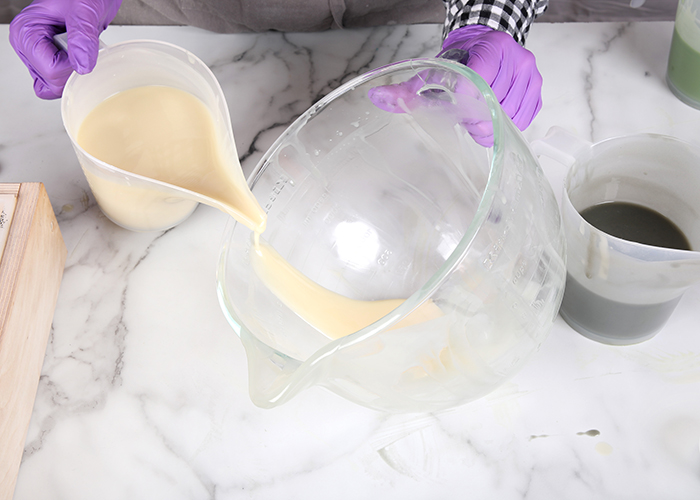
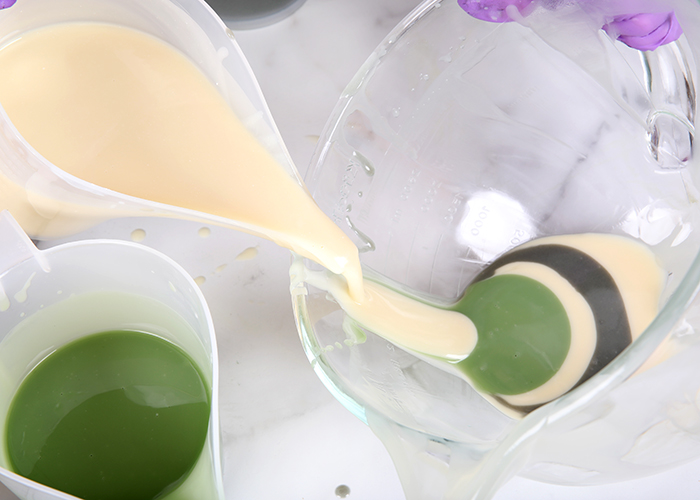
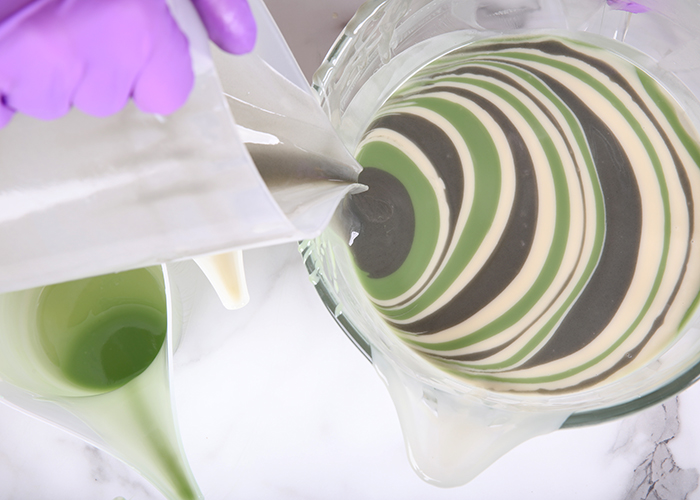
TEN: Begin pouring white soap into the large bowl, allowing it to run down the side. As you pour, count 1, 2, 3, 4 to keep each pour consistent. The exact amount of soap you pour at a time is up to you. The more soap you pour into the bowl at a time, the fewer total layers there will be.
NOTE: We tilted the bowl while pouring to help the soap run down the side of the bowl more. This could make pouring trickier. If it feels too unstable, leave the bowl level on the table. Just be very careful when pouring that the soap doesn’t drop into the soap and break through to the layers in the bowl.
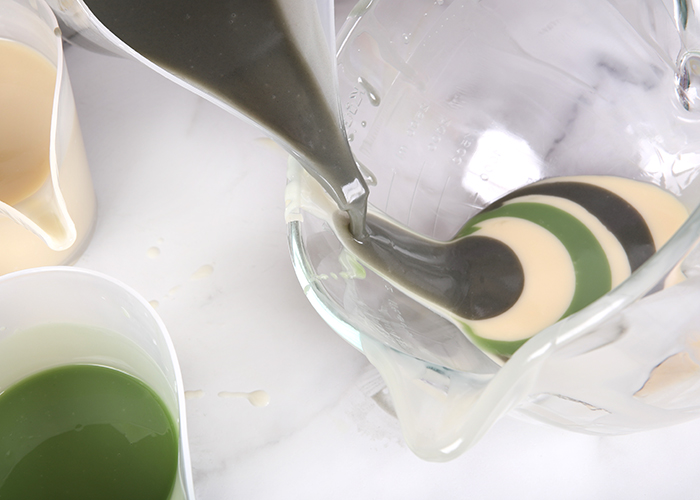
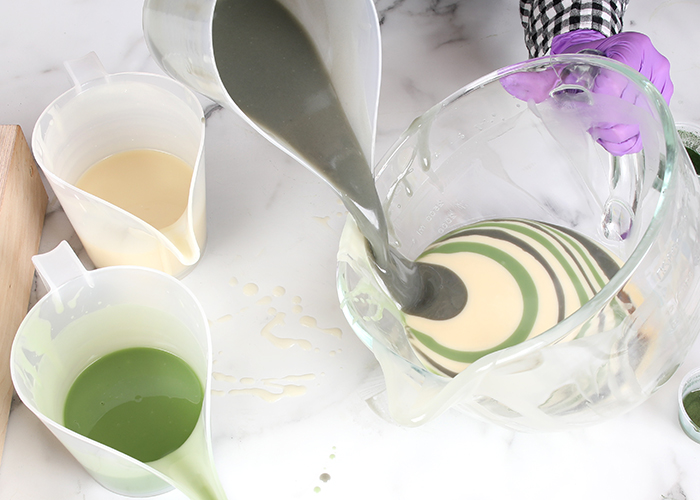
ELEVEN: Continue pouring the soap into the bowl in the pattern of white, black, white, green. Counting while pouring helps keep the pours consistent.
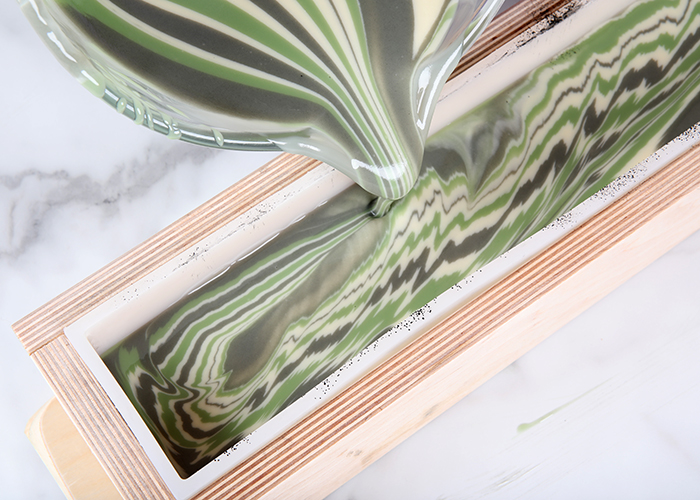
TWELVE: Once all of the soap is in the large bowl, begin to pour the soap into a corner of the mold. Be very careful – you don’t want the soap to break through the layer below.
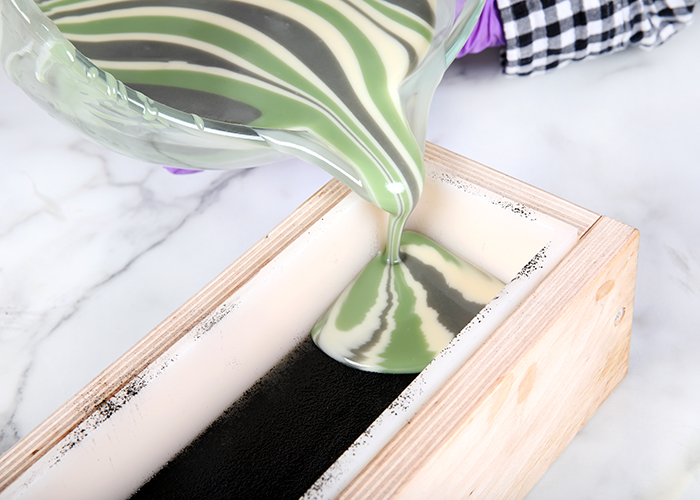
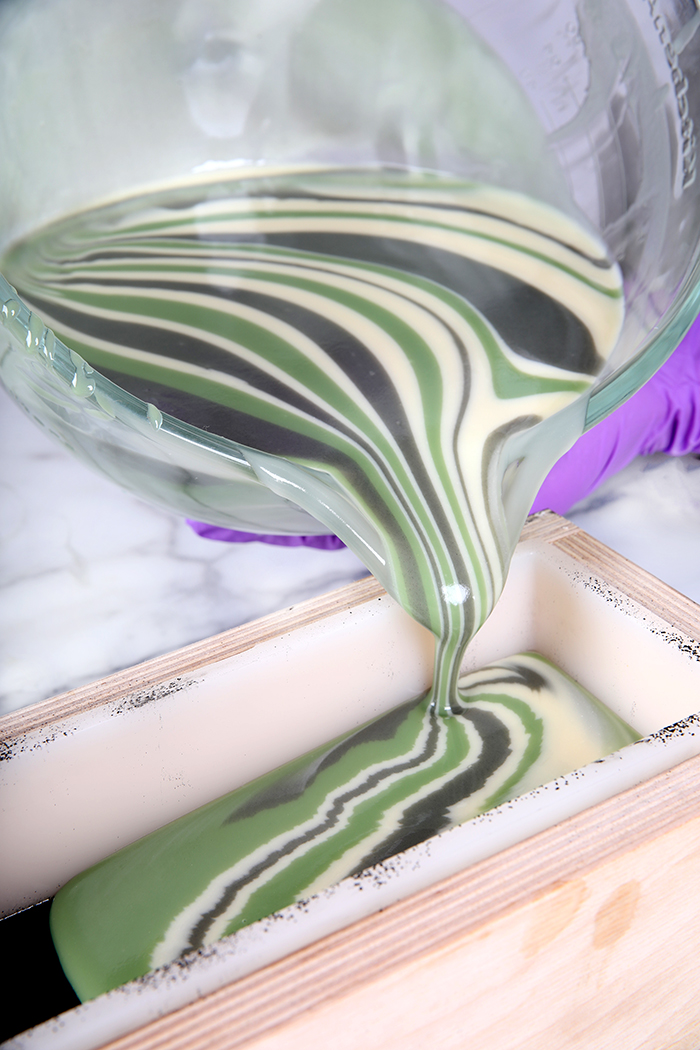
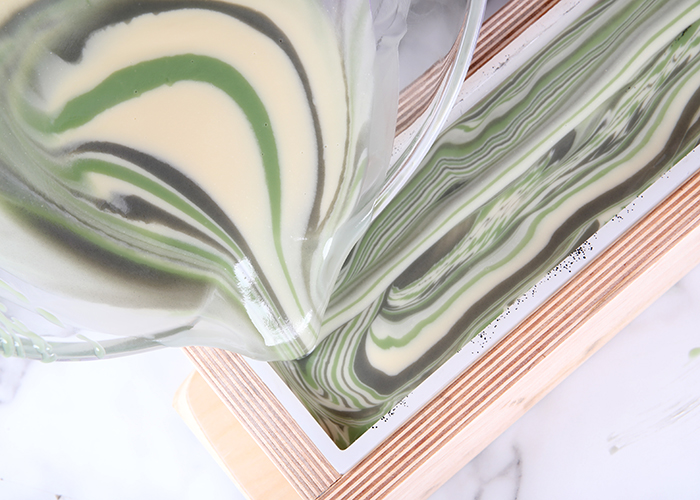
THIRTEEN: As the mold begins to fill up, slowly move the bowl down the length of the mold while pouring.
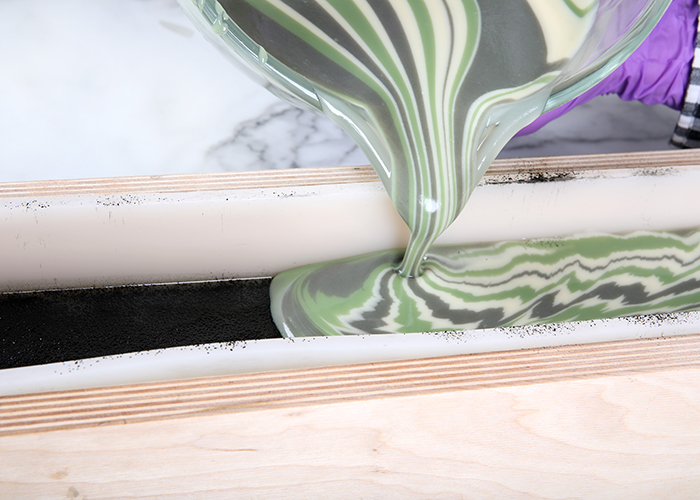
FOURTEEN: Once there is about 1/4 of the soap left to pour, begin moving the bowl down the length of the mold more and more to create long stripes. Try to pour as straight as you can.

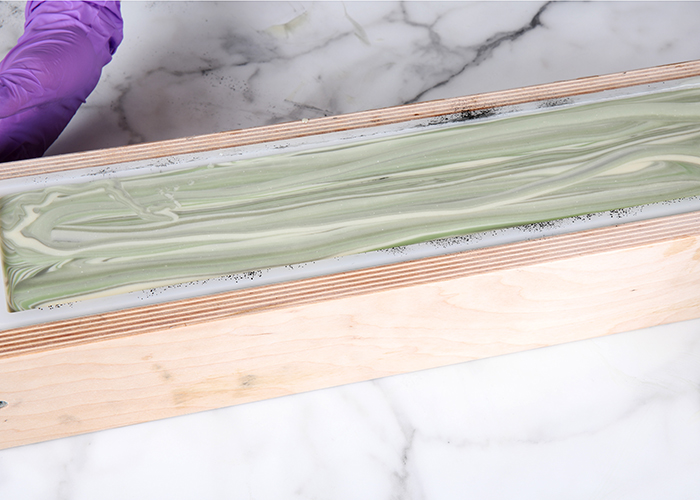
FIFTEEN: Once all the soap has been poured, tap the mold on the counter to get rid of bubbles. Spritz the top with 99% isopropyl alcohol to prevent soda ash. To help the colors pop, we forced the soap through gel phase by placing it on a heating pad set to medium-high for about 1-2 hours. We covered the mold using cardboard and a towel to insulate for 24 hours.
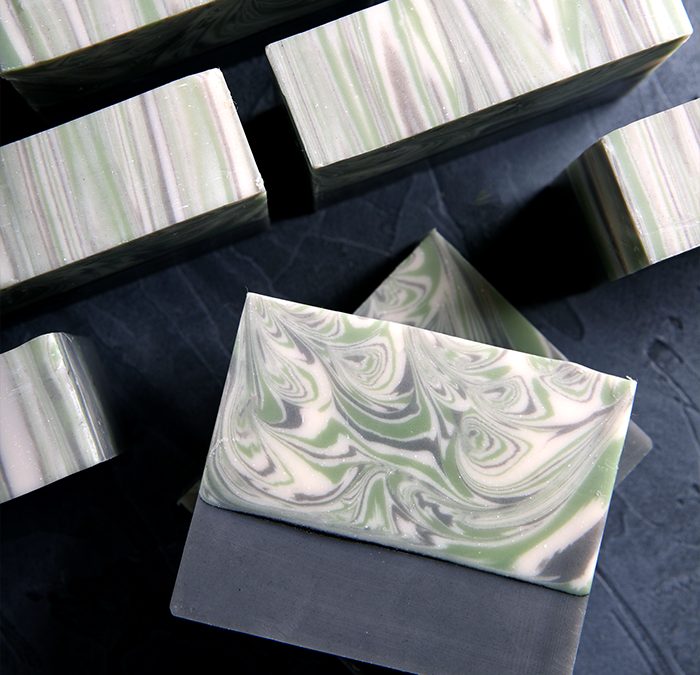
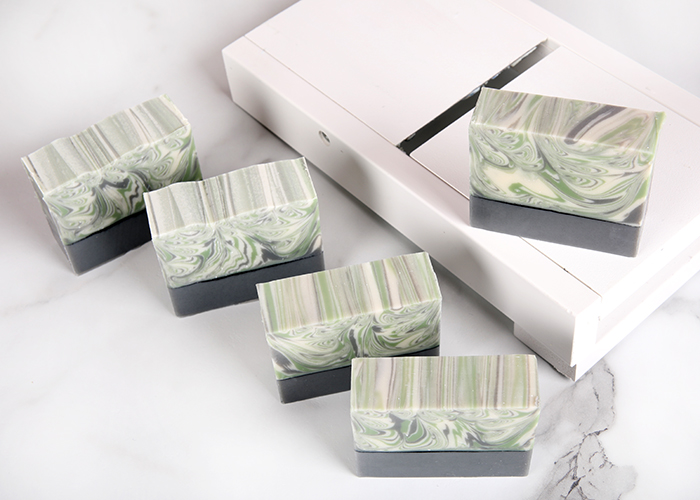
SIXTEEN: Remove the soap from the mold after 1-3 days (depending if you used sodium lactate or not). Cut the soap into bars. After the bars were cut, we used the Soap Shaver to smooth the tops. Adjust the shaver to only slice off a small amount and quickly slide the soap over the blade. Continue to do this until you’re happy with the look of the top. Allow the soap to cure for 4-6 weeks and enjoy!
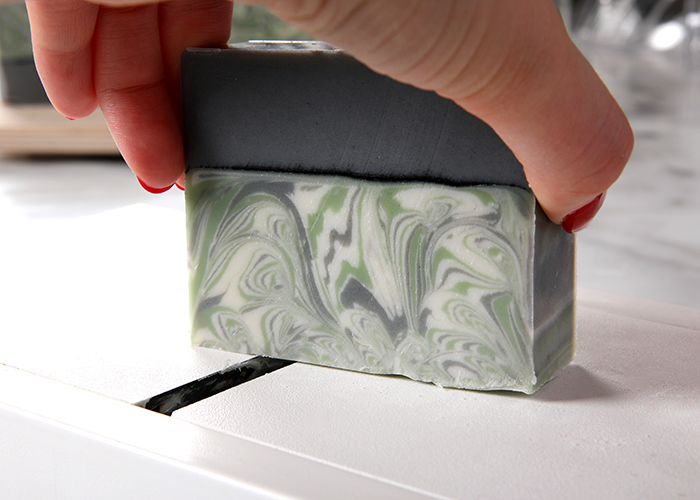
The two bars in the top left haven’t been shaved while the three bars on the right have. You’ll notice the Soap Shaver took off a bit of soda ash, which made the colors look more vibrant. The smooth and even texture also looks more polished.
Birchwood Oud Cold Process Soap
Cook time 2 hours
Total time 2 hours
If you’re an advanced soap maker ready for a challenge, this project is for you.
Author: Bramble Berry
Photographer: Amanda Kerzman, Christina Becker
Recipe type: Cold Process Soap
Serves: 5 pounds of soap
Ingredients
- 5 Pound Mold with Sliding Bottom
- Silicone Liner for 5 lb. Wood Mold
- 13.8 oz. Coconut Oil (25%)
- 2.8 oz. Jojoba Oil (5.1%)
- 5.5 oz. Lingonberry Seed Oil (10%)
- 2.8 oz. Chia Seed Oil (5%)
- 16.5 oz. Olive Oil (29.9%)
- 13.7 oz. Palm Oil (24.9%)
- 7.6 oz. Sodium Hydroxide Lye
- 16.4 oz. Distilled Water (10% water discount)
- 3.5 oz. Birchwood Oud Fragrance Oil
- Titanium Dioxide
- Activated Charcoal
- Green Chrome Oxide Pigment
- Evergreen Mica
Instructions COLORANT PREP: Disperse 1 teaspoon of titanium dioxide into 1 tablespoon of a lightweight liquid oil such as sunflower or sweet almond. In separate containers, disperse ½ teaspoon Green Chrome Oxide Pigment and ½ teaspoon Evergreen Mica into ½ tablespoon of lightweight liquid oil. Finally, disperse 1 teaspoon of activated charcoal into 1 tablespoon of lightweight oil. Use a mini mixer to get rid of clumps. Optional: To ensure the titanium dioxide blends smoothly into the soap, we recommend micronizing it before dispersing it in oil. Use a coffee grinder to break up any clumps of color and prevent streaks of white from showing in the final soap. We like to use a coffee grinder that has a removable stainless steel mixing area for easy cleaning. FRAGRANCE PREP: In a glass fragrance oil-safe container, measure out 3.5 ounces of Birchwood Oud Fragrance Oil and set aside. SAFETY FIRST: Suit up for safe handling practices. That means goggles, gloves, and long sleeves. Make sure kids, pets, other distractions, and tripping hazards are out of the house or don’t have access to your soaping space. Always soap in a well-ventilated area.
- Slowly and carefully add 7.6 ounces of lye to 16.4 ounces of distilled water. Gently stir until the lye has fully dissolved. Set it aside to cool. If you’d like a harder bar of soap that releases faster from the mold, you can add sodium lactate to the cooled lye water. Use 1 teaspoon of sodium lactate per pound of oils in the recipe. For this recipe, you’d add 3.5 teaspoons sodium lactate.
- Melt and combine 13.8 ounces of coconut oil, 2.8 ounces of jojoba oil, 5.5 ounces of lingonberry seed oil, 2.8 ounces of chia seed oil, 16.5 ounces of olive oil, and 13.7 ounces of palm oil (completely melt the entire container of palm oil before portioning) into a large mixing bowl. Once the lye water and the oils have cooled to 130 degrees F or below (and are ideally within 10 degrees of each other), add the lye water to the oils and stick blend the mixture to a very thin trace.
- Pour off 800 mL of soap into a separate container and add 1.5 teaspoons of dispersed activated charcoal.
- Add a proportional amount of the measured Birchwood Oud Fragrance Oil to the gray soap – it’s okay to eyeball it.
- Stick blend the soap for a few pulses to fully mix in the fragrance and colorant, and to reach a slightly thicker trace. The soap needs to be thin enough to pour and spread out in the mold evenly. You want the soap to be smooth and not hold any texture. That will give you the straightest layer.
- Pour all of the gray soap into the mold. Tap the mold on the counter to help get rid of bubbles and to evenly distribute the soap. NOTE: If this layer of soap gets too thick, you may want to texture the soap with a spoon to create a purposefully uneven layer. It will still look great, just a little bit different.
- Place a spoonful of activated charcoal into a Powder Duster. Use your finger to gently tap the Powder Duster and apply a thin, even layer of charcoal. Work quickly but carefully – activated charcoal can be a pain to clean up. Once the entire layer of soap is covered with a layer of charcoal, set the mold aside.
- Section off the remaining soap into separate containers. Add the following amounts of dispersed colorants to each container, and mix them in with a whisk.
Container A (700 mL): All dispersed titanium dioxide
Container B (400 mL): Remaining dispersed activated charcoal
Container C (400 mL): ¼ teaspoon dispersed Green Chrome Oxide + ½ teaspoon dispersed Evergreen Mica - Pour the remaining Birchwood Oud Fragrance Oil into the three containers proportionally – it’s okay to eyeball it. Use a whisk to fully mix in the fragrance.
- Begin pouring white soap into the large bowl, allowing it to run down the side. As you pour, count 1, 2, 3, 4 to keep each pour consistent. The exact amount of soap you pour at a time is up to you. The more soap you pour into the bowl at a time, the fewer total layers there will be. NOTE: We tilted the bowl while pouring to help the soap run down the side of the bowl more. This could make pouring trickier. If it feels too unstable, leave the bowl level on the table. Just be very careful when pouring that the soap doesn’t drop into the soap and break through to the layers in the bowl.
- Continue pouring the soap into the bowl in the pattern of white, black, white, green. Counting while pouring helps keep the pours consistent.
- Once all of the soap is in the large bowl, begin to pour the soap into a corner of the mold. Be very careful – you don’t want the soap to break through the layer below.
- As the mold begins to fill up, slowly move the bowl down the length of the mold while pouring.
- Once there is about ¼ of the soap left to pour, begin moving the bowl down the length of the mold more and more to create long stripes. Try to pour as straight as you can.
- Once all the soap has been poured, tap the mold on the counter to get rid of bubbles. Spritz the top with 99% isopropyl alcohol to prevent soda ash. To help the colors pop, we forced the soap through gel phase by placing it on a heating pad set to medium-high for about 1-2 hours. We covered the mold using cardboard and a towel to insulate for 24 hours.
- Remove the soap from the mold after 1-3 days (depending if you used sodium lactate or not). Cut the soap into bars. After the bars were cut, we used the Soap Shaver to smooth the tops. Adjust the shaver to only slice off a small amount and quickly slide the soap over the blade. Continue to do this until you’re happy with the look of the top. Allow the soap to cure for 4-6 weeks and enjoy!
- The two bars in the top left haven’t been shaved while the three bars on the right have. You’ll notice the Soap Shaver took off a bit of soda ash, which made the colors look more vibrant. The smooth and even texture also looks more polished.